Virtualization is a hot topic for a few years. All organizations, from the smallest to the largest, benefit of virtualization. Easy deployment of new servers, test lab, relocation (DRP & BCP), optimization of resources and much more. And what about security? How to integrate your virtual servers into your security policy?
Even if the basic administration is simplified, on top of the virtual machine runs a classic operating system with all the potential security breaches. How to integrate virtual servers in your backup policy? How to apply patches?
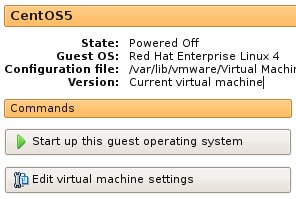
For sure, you have dormant VM’s. By “dormant”, I mean a VM that’s not running all the time or during a specific period of time (stopped or suspended). Such VM’s represent a risk. Let’s review them.
The first issue is related to snapshots. This cool features gives you the ability to work on a frozen copy of the operating system. It’s very useful to test a new software. Create a snapshot, install the new software. Once your tests done, revert to the previous snapshot. Easy! But… if your system is configured to automatically apply patches, there are risks of a patch installation on the current snapshot. What will happen if you decide to revert to a previous copy of your guest? The patch is gone! Dormant VM’s may also run old release of softwares. Be careful when you restart a VM stopped for a long time.
The next issue is related to cloning. To perform upgrades and tests, you can create a new VM based on the existing status of an existing one. You create a “clone”. Imagine you run a web server on “wwwA” and create a clone called “wwwB”. You perform some upgrades or deploy new features. If the old version (wwwA) is still available, there are risks that another admin restarts the old server instead of the new one.
The last issue concern virus scanning and backups. Your anti-virus can be configured to perform automatic scans at regular interval. Once again, if the VM is down, your system might remain unscanned for a while. Same for the backup procedure. Some backup scripts might not be executed and not copy critical files to a safe place.
There exists a lot of virtualization solutions (some free, other commercial). VMware is probably the most known. I’ll give you some tips to access your virtual disks data without booting the VM. Why? For backup purpose, anti-virus scan or just copy files. Note that this procedure can also be used for forensic investigations: By mounting the disk out of the VM context, we are sure that the content won’t be altered.
VMware provides a tool called “vmware-mount.pl” and is available with the server products (may be the workstation too?):
# vmware-mount.pl

This script requires 3 (not 0) mandatory argument(s).

Usage: /usr/bin/vmware-mount.pl
        -p          : Print the partition table
        disk        : Name of the Virtual Hard Disk file
or
        disk        : Name of the Virtual Hard Disk file
        partition   : Number of the partition
        [-t type]   : Partition type
        [-o options]: Partition mount options(s)
        mount-point : Directory where to mount the partition
Here is an example with a VM running Ubuntu on my VMware server at home:
# mkdir /mnt/ubuntu
# cd "/var/lib/vmware/Virtual Machines/Ubuntu"
The VMware disk files are called “*.vmdk”
# ls *.vmdk
Ubuntu-s001.vmdk  Ubuntu-s003.vmdk  Ubuntu-s005.vmdk  Ubuntu-s007.vmdk
Ubuntu-s002.vmdk  Ubuntu-s004.vmdk  Ubuntu-s006.vmdk  Ubuntu.vmdk
Using the “-p” flag, we list the partitions available on the disk image. The partition number will be required to mount the file system:
# vmware-mount -p Ubuntu.vmdk
--------------------------------------------
VMware for Linux - Virtual Hard Disk Mounter
Version: 1.0 build-80187
Copyright 1998 VMware, Inc.  All rights reserved. -- VMware Confidential
--------------------------------------------

Nr      Start       Size Type Id Sytem
-- ---------- ---------- ---- -- ------------------------
 1         63   24001047 BIOS 83 Linux
 5   24001173    1156617 BIOS 82 Linux swap
Finally, mount the Linux file system:
# vmware-mount.pl Ubuntu.vmdk 1 /mnt/ubuntu
--------------------------------------------
VMware for Linux - Virtual Hard Disk Mounter
Version: 1.0 build-80187
Copyright 1998 VMware, Inc.  All rights reserved. -- VMware Confidential
--------------------------------------------

It has been reported that this program does not work correctly with 2.4+ Linux
kernels in some cases, and you are currently running such a kernel. Do you
really want to continue? [N]  Y

-------------------------------------------------------------------
Virtual Hard Disk to Network Block Device mapper
Version: Releasebuild-80187
Copyright 1998-2003 VMware, Inc.  All rights reserved.
-------------------------------------------------------------------

Server: Ready to handle the connection on port 1024
Client: Got partition size: 24001047 sectors (11719 MB)

Client: The partition is now mapped on the /dev/nb0 Network Block Device.

Using another terminal, you can now browse your Virtual Hard Disk partition in
/mnt/ubuntu. Hit Control-C in this terminal when done.
Now your file system is available from the specified mount point:
# cd /mnt/ubuntu
# ls
bin    dev   initrd          lib         mnt   root  sys  var
boot   etc   initrd.img      lost+found  opt   sbin  tmp  vmlinuz
cdrom  home  initrd.img.old  media       proc  srv   usr  vmlinuz.old
If you’re a VirtualBox user, VDI files can also be used without starting the VM. Here is an interesting blog article with a procedure to mount VDI files.