Security professionals are high-profile users and virtualization is a key component of our labs. Many of us are also fans of Macbook laptops. But since Apple started to roll out its new computers with M1 processors, we are facing a major issue… The M1 is an ARM-based chipset and this architecture has a huge impact on virtualization… Let’s be clear: Today, there is no way to easily run a classic (Intel) Windows guest on an M1-based Macbook! We see here and there blog posts that explain how to install an ARM version of Windows 11 on a new Macbook but it remains unpractical to run your best tools on it. How can we deal with this?
My current Macbook pro is 1-year old and is pretty powerful (64GB RAM and 2TB of storage), I don’t have plans to change in the coming months but who knows 😉 When the time for a change will come, there will be no alternative (because I love Macbooks) and I’ll switch to a M1-setup. That’s why I decided to prepare for the future and change the way I’m working. I’m teaching the SANS FOR610 training and we use a malware analyzis lab based on two virtual machines: one Windows and one Linux (based on REMnux).
The idea is to get rid of the virtual machines on my Macbook and run them on a light device that I could bring with me when travelling. Let’s review the hardware I chose. My first idea was to use an Intel NUC but it was difficult to find one with multiple NICs onboard. After some research, I found the following MiniPC on Amazon:
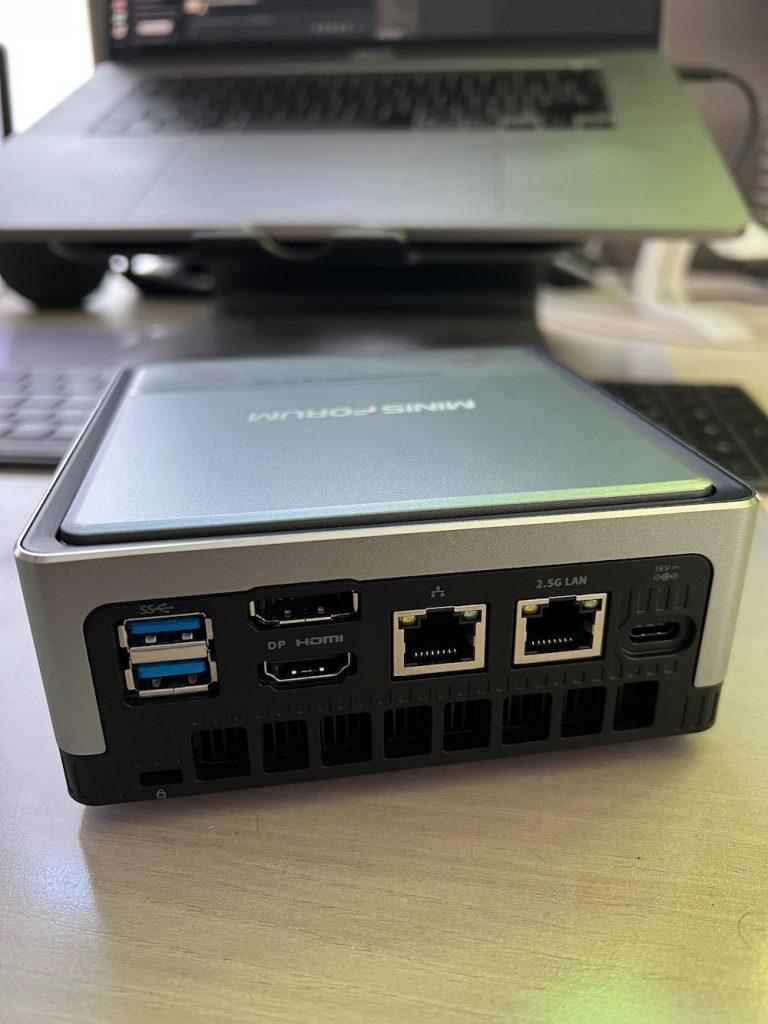
The hardware specifications are more then enough to run an hypervisor:
- Intel CPU with all virtualization features
- 2 x NICs (1GBits & 2.5Gbits)
- Wireless
- Enough USB ports
- 16GB memory
- 512GB SSD
- HDMI w/4K support (ok, less interesting for virtualization)
It’s possible to extend the memory by replacing the modules and an free slot is present to host an extra SSD!
My first choice was to use ESXi (the free version) but I faced a problem with the network chipsets. The 1Gbits port is based on a Realtek chipset and the 2.5Gbits one on an Intel chipset. I was able to generate a customized ESXi 6.7 image with the Realtek driver but no Intel. The Intel driver is available with ESXi 7.0 but … no the Realtek one! After testing multiple images, I gave up and decided to switch to something else: The perfect candidate was ProxMox! This hypervisor was already mentioned multiple times in my entourage. Based on Debian, this distribution offers a complete virtualization solution and it was able to detect and use all three NICs:
root@pve0:~# ip a|grep s0
2: enp1s0: mtu 1500 qdisc pfifo_fast master vmbr0 state UP group default qlen 1000
3: enp2s0: mtu 1500 qdisc noop state DOWN group default qlen 1000
4: wlp3s0: mtu 1500 qdisc noop state DOWN group default qlen 1000
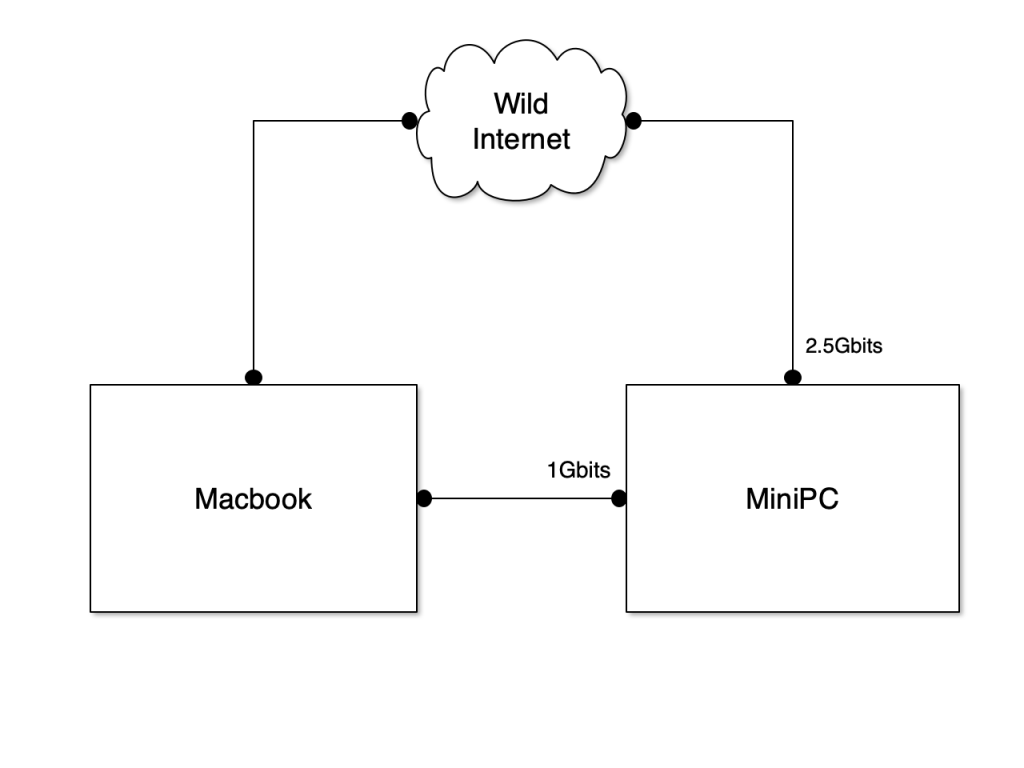
I won’t describe the installation of ProxMox, it’s pretty straightforward: Create a bootable USD drive, boot it and follow the wizard. The configuration is very simple, no cluster, nothing special. Once the setup is ready, the hypervisor is able to boot automatically without a keyboard and a screen. My network setup is the following: The 1Gbits NIC is dedicated to management and has a fixed IP address. It will be available on my home network and when traveling, I’ll just need a cross-cable between my Macbook and the MiniPC. The 2.5Gbits is dedicated to guests that need to be connected to the Internet.
The lab used by students during the FOR610 class requires to be disconnected from the Internet and any other network for security reasons. We use it to analyze pieces of malware. The first thing to do is to create a new network that will be isolated. In /etc/network/interfaces, add the following lines and restart the network:
auto vmbr1
iface vmbr1 inet static
address 10.0.0.1/24
bridge_ports none
bridge_stp off
bridge_fd 0
Then, I installed the two guests. Because SANS supports only the VMware hypervisor, the virtual machines are provided as VMware guests. The first step is to convert the disk images from VMDK to QCOW2. Because I don’t like to install specific tools on my Macbook, I’m a big fan of Docker containers. You can use a simple container that offers the qemu toolbox and directly convert the image:
$ docker run -v $(pwd):/data --rm heinedej/docker-qemu-utils \
      qemu-img convert \
               -f vmdk /data/REMnux-disk.vmdk \
               -O qcow2 /data/REMnux-disk.qcow2
Once the conversion completed, transfer the .cqow2 file (use scp) into /root/imported-disks/ on your Proxmox host.
It’s now time to create the two guests. Start with a standard config (assign resources depending on your future usage like cores and memory). Be sure to select the right bridge (the one created just above) for isolation. You will have to create a disk but we will deleted it later, just create a disk of a few Gigabytes.
My REMnux guest looks like this:
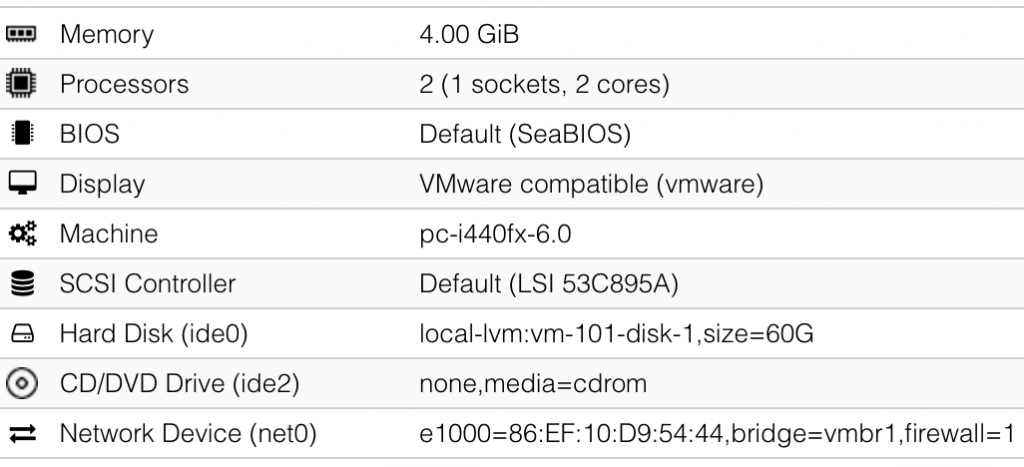
Note: I had to change the Display driver from “default” to “VMware compatible” to be able to boot the guest. Same for the SCSI controller.
And my REMWorkstation guest:

Once the guests are created, we must import the converted disks into an existing VM. SSH to the Proxmox and attach the disk images to newly created guests:
$ cd /root/imported-disks
$ qm importdisk <vm-id> <disk>.qcow2 local-lvm
Detach (and delete) the original disk created during the initial configuration, change the boot order and boot the guests. The last step is to configure the network to allow network connectivity between them. Configure a fixed IP address on REMnux and on REMworkstation. Usually, I use the bridge network + VM ID: 10.0.0.100 & 10.0.0.101. Don’t forget to configure the REMnux IP address as DNS server and default gateway on REMworkstation!
Last steps:
- Fine tune your hosts
- Create your initial snapshot
- Enable auto-start of both guests
Happy reversing!
Note: This setup can be deployed in a cloud environment or a colocation server.