 In my previous post, I spoke about the new feature introduced in TrueCrypt 5.0: the whole disk encryption. This is a killer feature for all of us who carry lot of sensitive data on our notebook hard drives. The data mobility became a hot topic in IT security for the last year: how much time did you read in the news that a notebook was stolen or lost with thousands of critical data. Companies, international organizations, everybody is concerned.
So, why not test this new feature in real life? I’m a happy TrueCrypt user for a while and it never caused loss of data but in this case, we will directly play with the whole disk. So, let’s act safely and perform some tests on a spare laptop. I reinstalled from scratch a Windows XP SP2 on a old Thinkpad, applied all the Microsoft Update required patches and installed TrueCrypt 5.0. The Windows XP configuration was a standard one. Only one big NTFS file system. Let’s go!
Download the latest TrueCrypt from here and install it.
 |
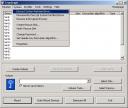
Launch the application and start the wizard via the menu “System” and “Encrypt System Partition/Drive”. |
 |
The goal is to encrypt the disk and unlock it at boot time. Choose ‘Encrypt the whole drive”. With this method all data stored on the disk will be encrypted event temporary files or the swap space! |
 |
In my cast, I just reinstalled a fresh XP, no multi boot required. |
 |
My notebook is quite old (Pentium3). Benchmarks reported the Twofish encryption algorithm as the fastest. Feel free to choose yours. |
 |
Choose a strong password! This password will asked by the new boot loader before launching the OS. As the password will be typed only once, do not hesitate to use a very strong one. The whole system security will depend on it. |
  |
Now, let your cat play with your mouse to generate some random data! 😉 |
   |
Maybe the most important step: creation of the rescue boot disk! You cannot bypass this step. TrueCrypt will generate an ISO file for you with all the material required to recover your system in case of issue. Notice that you need to have access to a CD/DVD burner during the setup: TrueCrypt will re-read the freshly burned ISO and verify it. It’s boring but you are sure that your recovery disk is ok. Store it in a safe place (read: not next to your encrypted notebook) |
 |
Choose the wipe mode which best fit your security requirements. To keep things simple, the wipe mode is the method that TrueCrypt will use to overwrite data. |
 |
We are now ready for the big jump! TrueCrype will install the boot loader. A reboot is required to test all the stuff. |
 |
You should now receive a new screen before the OS boot. Type the password choosen above. |
 |
Yeeeepie! Everything runs fine. |
 |
We are now ready for the final step: the encryption of the disk itself. This operation is fully transparent as TrueCrypt will process its data only when the system is idle. You can also decide to suspend the encryption manually (defer) and restart it later. |
 |
Now, the bad news. I performed this test on two different notebooks and two different disks. In both case, the encryption process stopped with a CRC error. I checked the disk using the tool provided by Windows. No errors found. According to a post in the TrueCrypt support forums, TrueCrypt is very (too) sensitive to soft errors on disk. It seems to be a bug. After testing a third disk, it was ok. |
And now? I’m working with an encrypted disk for three days no. No big issue. But if you read the forums, the product is quite “young” and some issues must still be solved:
- Extended partitions are unavailable once the disk is encrypted.
- Hybernation mode does not work (but stand-by is ok)
I hope that those small bugs will be fixed soon. Anyway, TrueCrypt remains a must for people who travel with sensitive data!
Yes, it’s 2011.
Yes, the create the ISO CAN be skipped.
To encrypt, start from the command line and start the “TrueCrypt Format.exe” with the /noisocheck parameter. Please note the program I mentioned and launch it and NOT use the “TrueCrypte.exe” program. The parameter … is lost in the translation. Launch the format program, choose encrypt disk and proceed. You can still create the ISO and store it someplace else.
Hi Jebbs,
The created ISO file can be installed on a USB stick! CD’s are mandatory!
really stupid software that won’t let you skip the cd creation step…..my state of the art PC doesn’t have a CD drive, who uses CD’s anymore?